Kubeadm : 쿠버네티스에서 공식 제공하는 클러스터 생성/ 관리 도구
kubespray : 쿠버네티스 클러스터를 배포하는 오픈 소스 프로젝트
- 다양한 형식으로 쿠버네티스 클러스터 구성 가능 (특히, 멀티 마스터 구현)
- 온프레미스에서 상용 서비스 클러스터 운영시 유용
- 다양한 CNI 제공
CNI(Container Network Intertace)
- Container간 통신을 지원하는 VxLAN, Pod Network이라고도 부름
- 다양한 종류의 플러그인이 존재. ex. flannel, Calico, Weavenet
쿠버네티스 환경 구성
⭐ 참고 영상 : https://www.youtube.com/watch?v=CKUv3oEI8Yo&t=363s
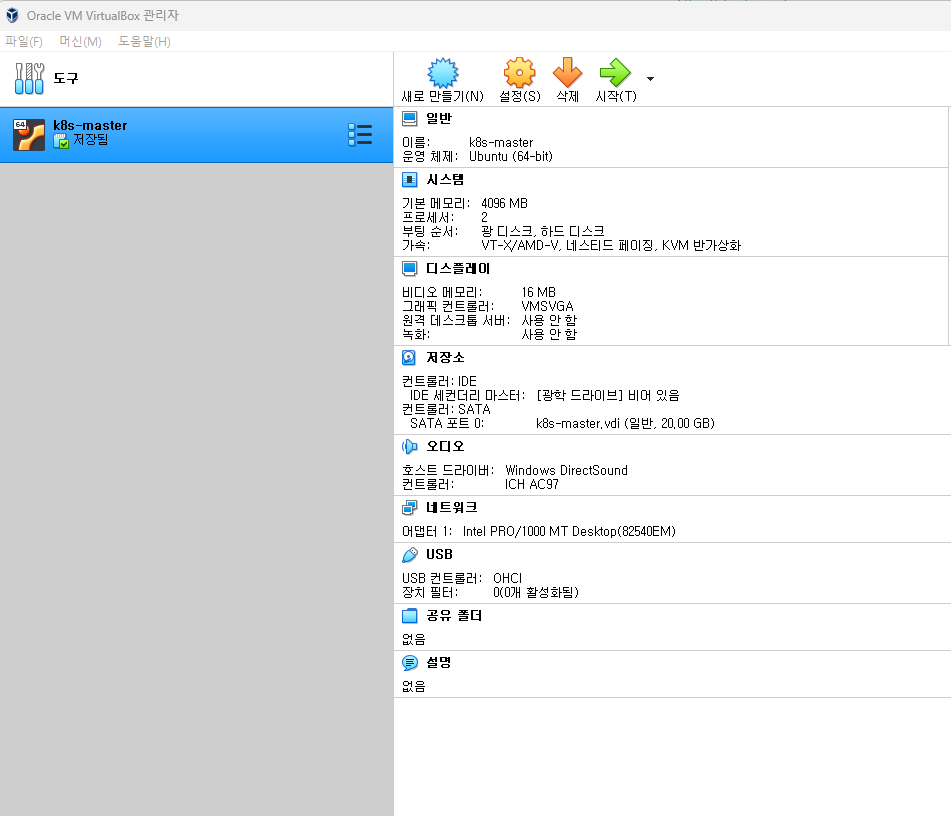
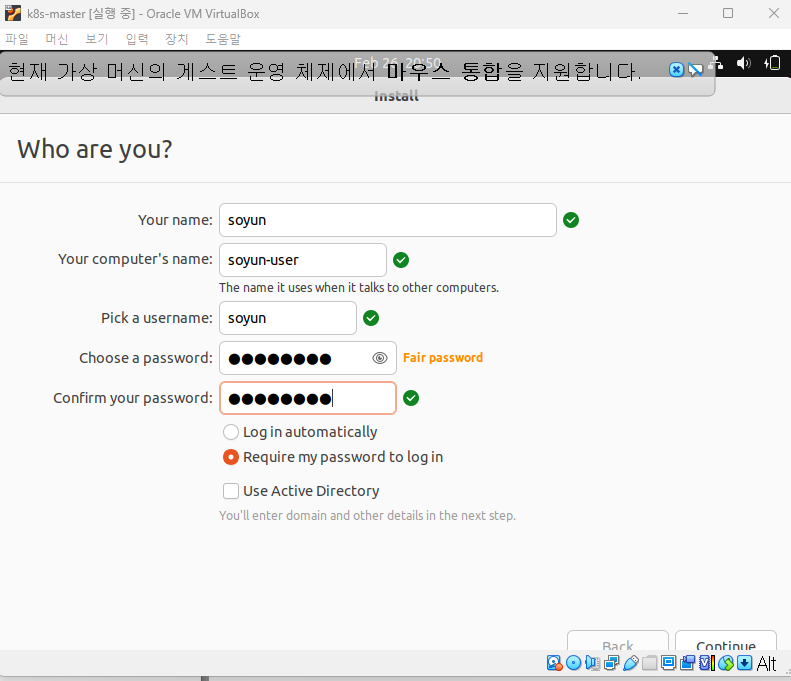
# VM 구성 및 도커 설치
👉 강의는 Ubuntu 22.04 LTS로 설치했지만, 설치 중 오류가 나서 나는 Ubuntu 18.04.6 LTS로 설치했다.
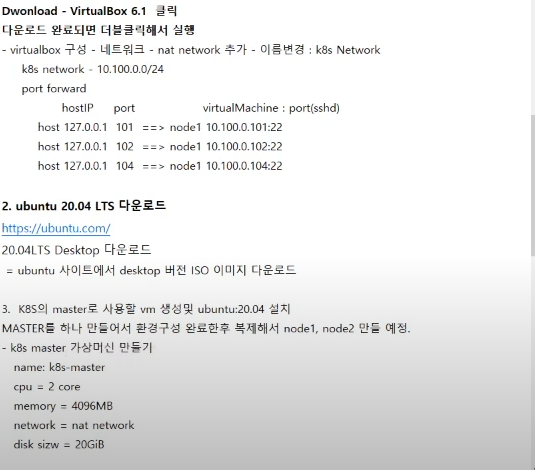
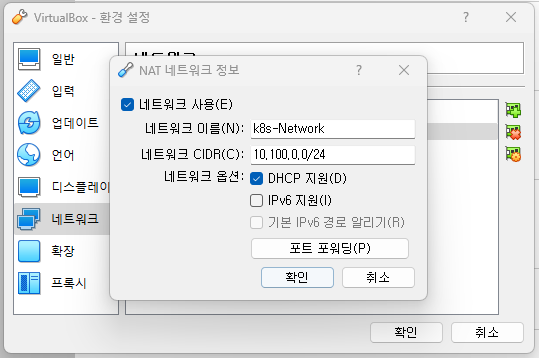
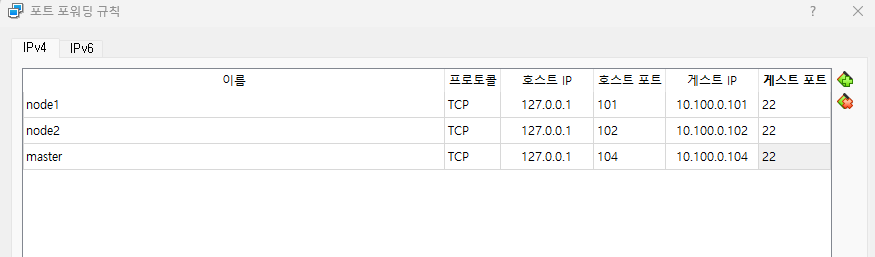
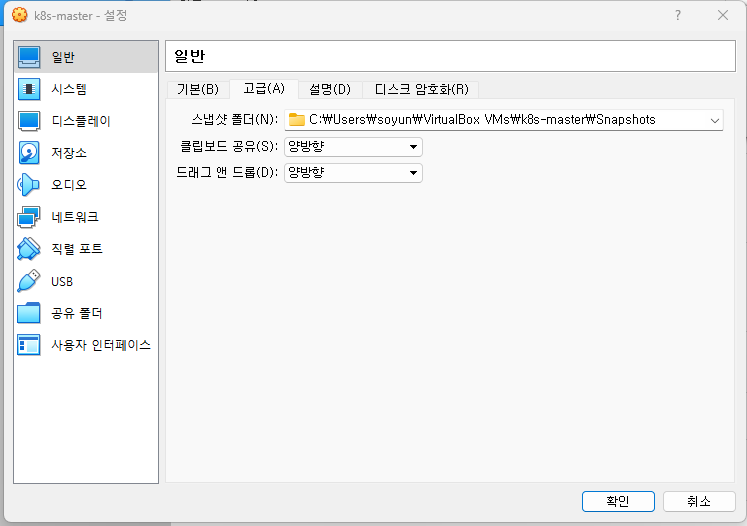
이렇게 설정하면 127.0.0.1:104로 접속하면 master로 로그인이 가능하다.
관리자 계정 생성
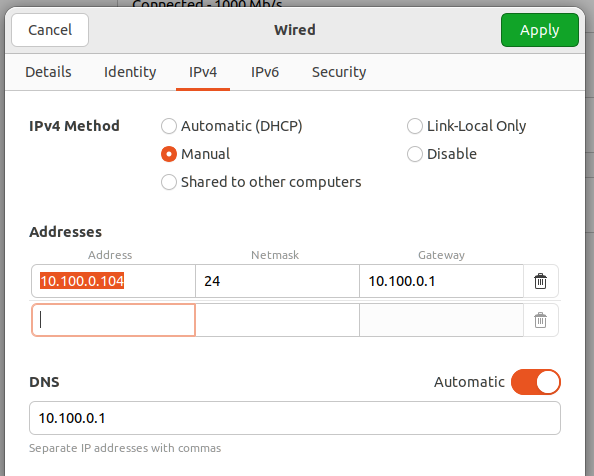
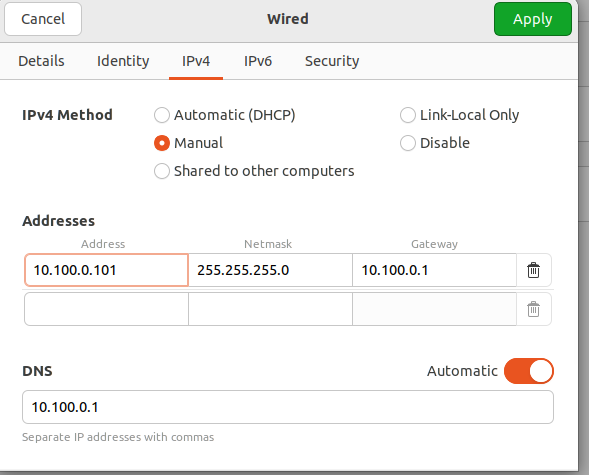
네트워크 IP address 10.100.0.104/24, gw 10.100.0.1, DNS 10.100.0.1 로 static address 변경
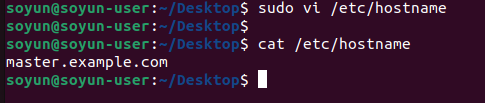
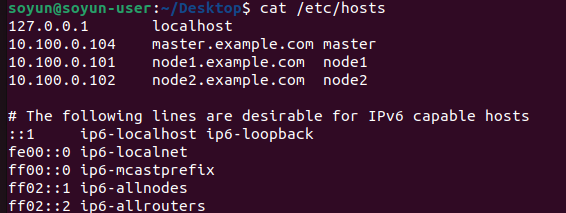
/etc/hosts에 내 호스트/ 다른 호스트 이름 등록
# SSH server 설치 및 서비스 동작

# Ubuntu는 OS 설치할 때 관리자 계정을 하나 만든다.
# 기본으로 root 로그인이 안되고, root에 PW가 지정이 안되어있어서 root 패스워드 따로 지정이 필요하다.
## sudo 명령은 일반유저가 슈퍼권한으로 do 명령을 실행할 수 있도록 해준다.
## root 계정을 못쓰는 상황에서 시스템 운영에 관한 명령 실행은 모두 sudo 관리명령어로 실행

$ sudo passwd root

# PWD 설정 후 root로 switch 후 update

$ apt-get update
## openssh-server가 원격 로그인 지원 서버
## curl은 command line 웹브라우저.
## vim은 에디터, tree는 디렉토리 구조를 tree구조로 확인하는 명령어

soyun@master:~$ sudo apt-get install -y openssh-server curl vim tree
⭐ Docker Install : https://docs.docker.com/engine/install/ubuntu/
Install Docker Engine on Ubuntu
Jumpstart your client-side server applications with Docker Engine on Ubuntu. This guide details prerequisites and multiple methods to install Docker Engine on Ubuntu.
docs.docker.com
Install Docker Desktop on Ubuntu
Learn how to install, launch and upgrade Docker Desktop on Ubuntu. This quick guide will cover prerequisites, installation methods, and more.
docs.docker.com
# Set up Docker's apt repository
soyun@master:~$ sudo apt-get install -y apt-transport-https curl ca-certificates gnupg-agent software-properties-common


# Add Docker's official GPG key:
$ sudo install -m 0755 -d /etc/apt/keyrings
$ sudo curl -fsSL https://download.docker.com/linux/ubuntu/gpg -o /etc/apt/keyrings/docker.asc
$ sudo chmod a+r /etc/apt/keyrings/docker.asc

# Add the repository to Apt sources:
echo \
  "deb [arch=$(dpkg --print-architecture) signed-by=/etc/apt/keyrings/docker.asc] https://download.docker.com/linux/ubuntu \
  $(. /etc/os-release && echo "$VERSION_CODENAME") stable" | \
  sudo tee /etc/apt/sources.list.d/docker.list > /dev/null
$ sudo apt-get update

# To install the latest version, run:
$ sudo apt-get install docker-ce docker-ce-cli containerd.io docker-buildx-plugin docker-compose-plugin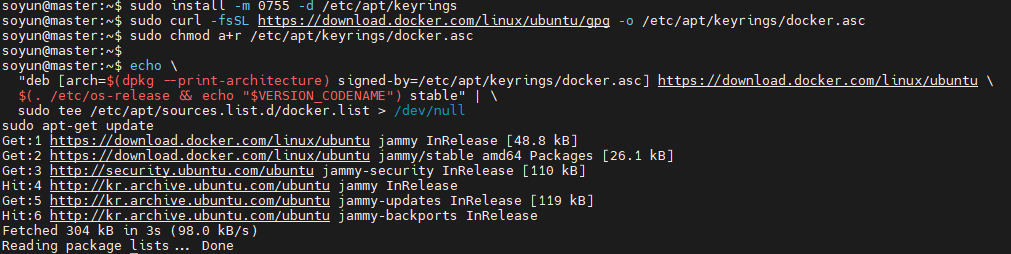

👉 Docker Engine 설치가 성공적으로 됐는지 확인하기
Verify that the Docker Engine installation is successful by running the hello-world image.
$ sudo docker run hello-world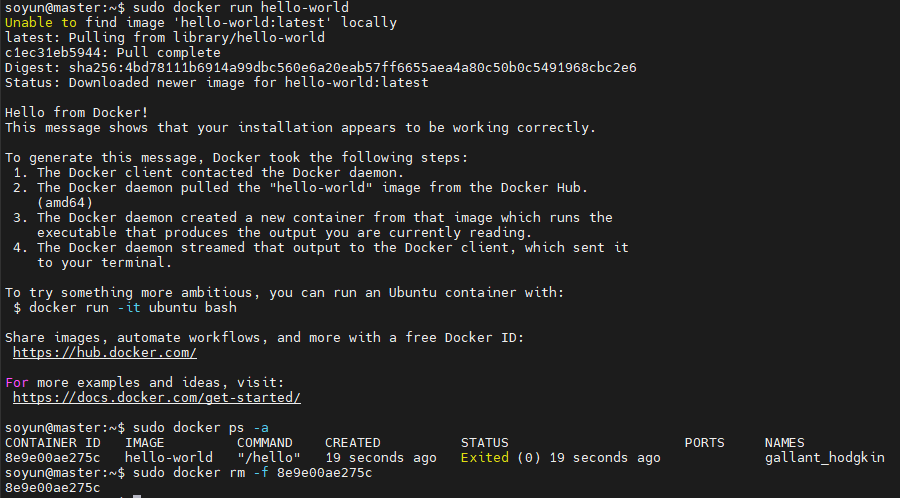
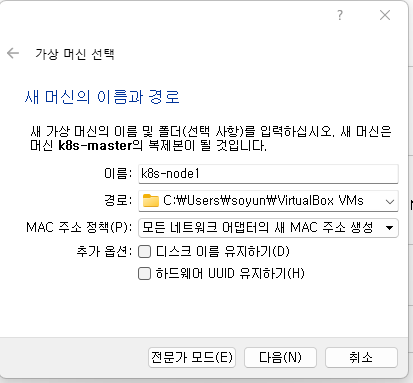
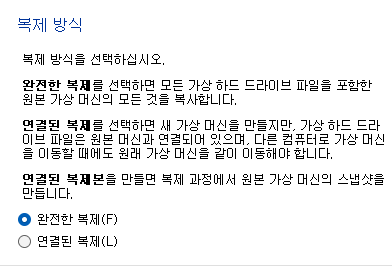
⭐이제 가상머신 복제 필요 (node1, node2)
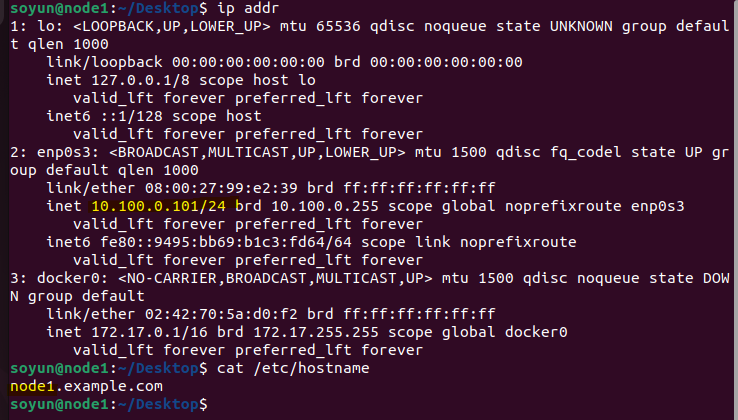
👉 master1 -> node 1로 복제 후 환경 구성 변경 : ipadress, hostname 변경 필요
# Control Plane(Master node)
- 워커 노드들의 상태를 관리하고 제어
- single master
# Worker node
- 도커 플랫폼을 통해 컨테이너를 동작하여 실제 서비스를 제공
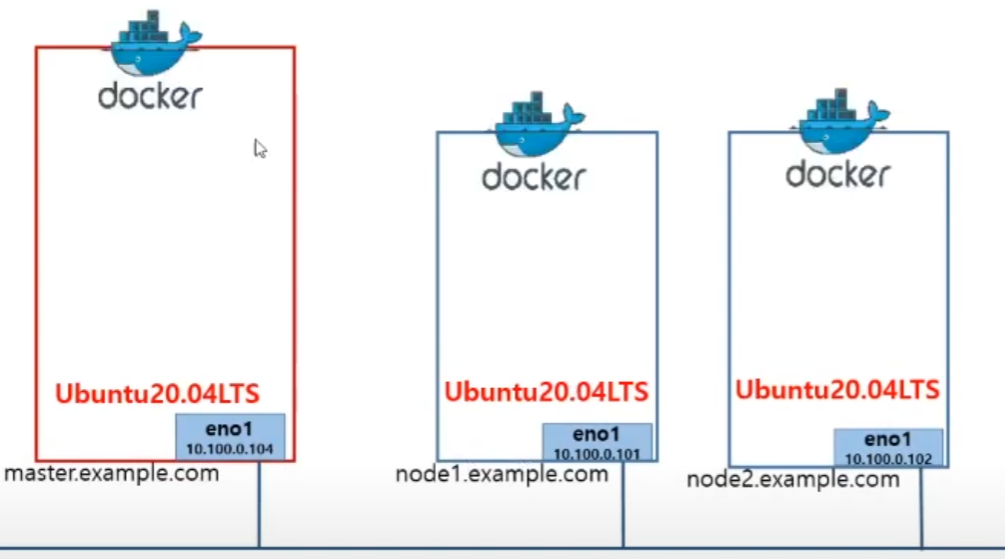
👉 이후 노드 2로 동일 작업 진행!!
# 쿠버네티스 설치
kubernetes.io 사이트 접속해서 kubeadm 툴을 이용해 쿠버네티스 설치 : Link
Installing kubeadm
This page shows how to install the kubeadm toolbox. For information on how to create a cluster with kubeadm once you have performed this installation process, see the Creating a cluster with kubeadm page. This installation guide is for Kubernetes v1.29. If
kubernetes.io
💡 주의 사항 : 따배쿠 강사님 Git
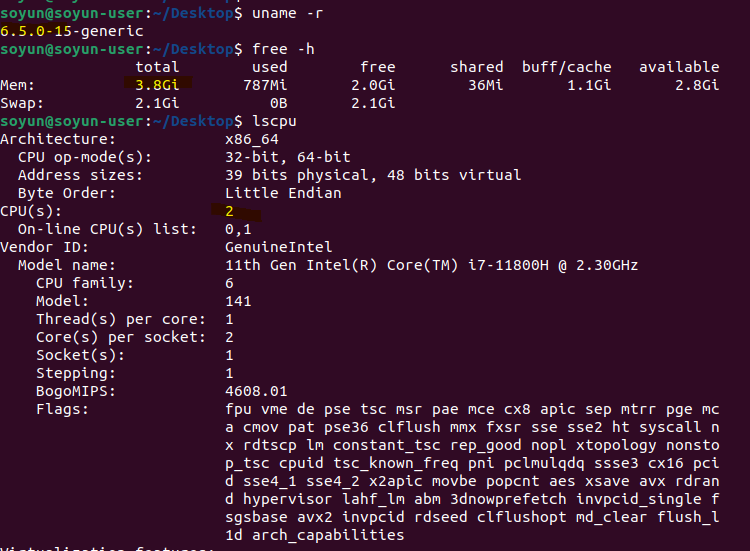
- 2 GB or more of RAM per machine (any less will leave little room for your apps).
- 2 CPUs or more.
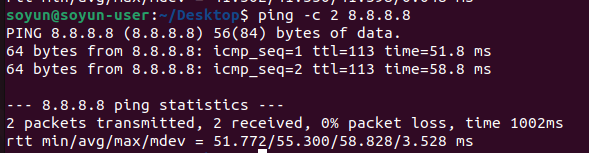
- Full network connectivity between all machines in the cluster (public or private network is fine).
- You MUST disable swap if the kubelet is not properly configured to use swap. For example, sudo swapoff -a will disable swapping temporarily. To make this change persistent across reboots, make sure swap is disabled in config files like /etc/fstab, systemd.swap, depending how it was configured on your system.
sudo -i

# Swap disabled
swapoff -a && sed -i '/swap/s/^/#/' /etc/fstab
⭐ 브릿지 네트워크 구성
master, worker 노드가 브리지 네트워크를 listen 할 수 있도록 설정하기
# Letting iptables see bridged traffic
cat <<EOF | sudo tee /etc/sysctl.d/k8s.conf
net.bridge.bridge-nf-call-ip6tables = 1
net.bridge.bridge-nf-call-iptables = 1
EOF

sudo sysctl --system
# Private 망이기 때문에 모든 방화벽 해제 후 실습
# Disable firewall
systemctl stop firewalld
systemctl disable firewalld
# Installing runtime
# docker 설치 완료 동작중
sudo apt-get update
# apt-transport-https may be a dummy package; if so, you can skip that package
sudo apt-get install -y apt-transport-https ca-certificates curl gpg
# If the folder `/etc/apt/keyrings` does not exist, it should be created before the curl command, read the note below.
# sudo mkdir -p -m 755 /etc/apt/keyrings
curl -fsSL https://pkgs.k8s.io/core:/stable:/v1.29/deb/Release.key | sudo gpg --dearmor -o /etc/apt/keyrings/kubernetes-apt-keyring.gpg
# apt repo에 k8s추가하기.
# This overwrites any existing configuration in /etc/apt/sources.list.d/kubernetes.list
echo 'deb [signed-by=/etc/apt/keyrings/kubernetes-apt-keyring.gpg] https://pkgs.k8s.io/core:/stable:/v1.29/deb/ /' | sudo tee /etc/apt/sources.list.d/kubernetes.list
# Installing kubeadm, kubelet, kubectl
sudo apt-get update
sudo apt-get install -y kubelet kubeadm kubectl
sudo apt-mark hold kubelet kubeadm kubectl
# Restarging the kubelet (필요에 따라)
systemctl daemon-reload
systemctl restart kubelethttps://www.itzgeek.com/how-tos/linux/ubuntu-how-tos/install-containerd-on-ubuntu-22-04.html
How to Install Containerd on Ubuntu 22.04 / Ubuntu 20.04 | ITzGeek
containerd is an industry-standard container runtime that manages the complete container lifecycle of its host system. It handles image
www.itzgeek.com
# 최신 버전 containerd 다운로드
wget https://github.com/containerd/containerd/releases/download/v1.6.2/containerd-1.6.2-linux-amd64.tar.gz
sudo tar -xvf containerd-1.6.2-linux-amd64.tar.gz

# systemd service file 다운 및 설치
wget https://raw.githubusercontent.com/containerd/containerd/main/containerd.service
sudo mv containerd.service /usr/lib/systemd/system/

# containerd start
sudo systemctl daemon-reload
sudo systemctl enable --now containerd

# 서비스 확인
sudo systemctl status containerd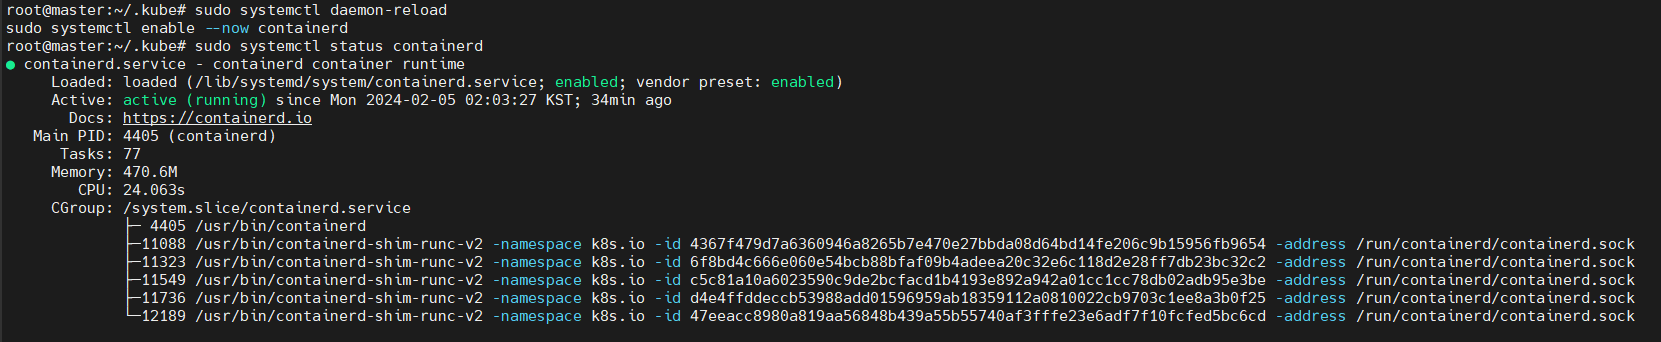
# Creating a single control-plane cluster with kubeadm
## master 컴포넌트 구성 - 초기화 (마스터에서만 실행)
## control-plane(master)시스템에 API controller, scheduler, etcd, coredns 구성됨
kubeadm init
❌ kubeadm init 실행 중 오류 발생시
root@master:~# kubeadm init
[init] Using Kubernetes version: v1.29.1
[preflight] Running pre-flight checks
error execution phase preflight: [preflight] Some fatal errors occurred:
        [ERROR CRI]: container runtime is not running: output: time="2024-02-05T02:01:37+09:00" level=fatal msg="validate service connection: validate CRI v1 runtime API for endpoint \"unix:///var/run/containerd/containerd.sock\": rpc error: code = Unimplemented desc = unknown service runtime.v1.RuntimeService"
, error: exit status 1
[preflight] If you know what you are doing, you can make a check non-fatal with `--ignore-preflight-errors=...`
To see the stack trace of this error execute with --v=5 or higher


# containerd 데몬에서 cri옵션 버그 발생

# WA 수행
root@master:~# sudo rm /etc/containerd/config.toml
root@master:~# sudo systemctl restart containerd


root@master:~# sudo kubeadm init
...
Your Kubernetes control-plane has initialized successfully!
# 인증을 위해 K8S 관리자의 계정 홈 디렉토리에 인증정보 저장
To start using your cluster, you need to run the following as a regular user:

  mkdir -p $HOME/.kube
  sudo cp -i /etc/kubernetes/admin.conf $HOME/.kube/config
  sudo chown $(id -u):$(id -g) $HOME/.kube/config

Alternatively, if you are the root user, you can run:

  export KUBECONFIG=/etc/kubernetes/admin.conf

You should now deploy a pod network to the cluster.
Run "kubectl apply -f [podnetwork].yaml" with one of the options listed at:
  https://kubernetes.io/docs/concepts/cluster-administration/addons/

Then you can join any number of worker nodes by running the following on each as root:

kubeadm join 10.100.0.104:6443 --token <token> \
        --discovery-token-ca-cert-hash <Hash>
        # 워커노드 연결을 위해 토큰 복사
# kubeadm 초기화
$ sudo kubeadm reset
$ sudo systemctl restart kubelet
$ sudo reboot
# kubeadm init 부터 다시한다
$ sudo kubeadm init --pod-network-cidr=10.100.0.0/16root@master:~/.kube# vi /etc/sysctl.conf
# net.ipv4.ip_forward=1행 주석 제거
root@master:~/.kube# sysctl -p
net.ipv4.ip_forward = 1
root@master:~/.kube# cat /proc/sys/net/ipv4/ip_forward
1
root@master:~/.kube# modprobe br_netfilter
root@master:~/.kube# echo 1 > /proc/sys/net/bridge/bridge-nf-call-iptables
👉 master 컴포넌트 구성 - Installing a pod network add-on
root@master:~# kubectl get nodes
NAME                 STATUS     ROLES           AGE     VERSION
master.example.com   NotReady   control-plane   2m55s   v1.29.3
# NotReady로 뜬 걸 확인할 수 있는데, CNI가 설치가 안되어서 그렇다.


# Weave Networks
root@master:~$ kubectl apply -f https://github.com/weaveworks/weave/releases/download/v2.8.1/weave-daemonset-k8s-1.11.yaml
serviceaccount/weave-net created
clusterrole.rbac.authorization.k8s.io/weave-net created
clusterrolebinding.rbac.authorization.k8s.io/weave-net created
role.rbac.authorization.k8s.io/weave-net created
rolebinding.rbac.authorization.k8s.io/weave-net created
daemonset.apps/weave-net created

root@master:~# kubectl get nodes
NAME                 STATUS   ROLES           AGE     VERSION
master.example.com   Ready    control-plane   6m28s   v1.29.3
# Ready로 바뀐 것 확인 가능
Worker node를 master에 (master에서 저장한 토큰을 통해) Join 시키기. 👉 control-plane에서 연결되었는지 확인
# Node 1
root@node1:~# kubeadm join 10.100.0.104:6443 --token s2ox8a.pagbj6cyzn73adv7 \
>         --discovery-token-ca-cert-hash sha256:a7c5ce7e3ce17f3a3d7d72707940959281730728443257b9c29a2e3c5efd116e
[preflight] Running pre-flight checks
error execution phase preflight: [preflight] Some fatal errors occurred:
        [ERROR CRI]: container runtime is not running: output: time="2024-03-16T23:07:42+09:00" level=fatal msg="validate service connection: validate CRI v1 runtime API for endpoint \"unix:///var/run/containerd/containerd.sock\": rpc error: code = Unimplemented desc = unknown service runtime.v1.RuntimeService"
, error: exit status 1
[preflight] If you know what you are doing, you can make a check non-fatal with `--ignore-preflight-errors=...`
To see the stack trace of this error execute with --v=5 or higher


# 이렇게 에러가 나면 WA를 적용해준다.
root@node1:~# rm /etc/containerd/config.toml
root@node1:~# systemctl restart containerd
root@node1:~# kubeadm join 10.100.0.104:6443 --token s2ox8a.pagbj6cyzn73adv7 \
>         --discovery-token-ca-cert-hash sha256:a7c5ce7e3ce17f3a3d7d72707940959281730728443257b9c29a2e3c5efd116e
[preflight] Running pre-flight checks
[preflight] Reading configuration from the cluster...
[preflight] FYI: You can look at this config file with 'kubectl -n kube-system get cm kubeadm-config -o yaml'
[kubelet-start] Writing kubelet configuration to file "/var/lib/kubelet/config.yaml"
[kubelet-start] Writing kubelet environment file with flags to file "/var/lib/kubelet/kubeadm-flags.env"
[kubelet-start] Starting the kubelet
[kubelet-start] Waiting for the kubelet to perform the TLS Bootstrap...

This node has joined the cluster:
* Certificate signing request was sent to apiserver and a response was received.
* The Kubelet was informed of the new secure connection details.

Run 'kubectl get nodes' on the control-plane to see this node join the cluster.


# 똑같이 Node2에도 적용!
root@node2:~# kubeadm join 10.100.0.104:6443 --token s2ox8a.pagbj6cyzn73adv7 \
>         --discovery-token-ca-cert-hash sha256:a7c5ce7e3ce17f3a3d7d72707940959281730728443257b9c29a2e3c5efd116e
[preflight] Running pre-flight checks
[preflight] Reading configuration from the cluster...
[preflight] FYI: You can look at this config file with 'kubectl -n kube-system get cm kubeadm-config -o yaml'
[kubelet-start] Writing kubelet configuration to file "/var/lib/kubelet/config.yaml"
[kubelet-start] Writing kubelet environment file with flags to file "/var/lib/kubelet/kubeadm-flags.env"
[kubelet-start] Starting the kubelet
[kubelet-start] Waiting for the kubelet to perform the TLS Bootstrap...

This node has joined the cluster:
* Certificate signing request was sent to apiserver and a response was received.
* The Kubelet was informed of the new secure connection details.

Run 'kubectl get nodes' on the control-plane to see this node join the cluster.
# master에서 확인
root@master:~# kubectl get nodes -o wide
NAME                 STATUS   ROLES           AGE     VERSION   INTERNAL-IP    EXTERNAL-IP   OS-IMAGE             KERNEL-VERSION     CONTAINER-RUNTIME
master.example.com   Ready    control-plane   8m38s   v1.29.3   10.100.0.104   <none>        Ubuntu 18.04.6 LTS   5.4.0-84-generic   containerd://1.6.21
node1.example.com    Ready    <none>          69s     v1.29.3   10.100.0.101   <none>        Ubuntu 18.04.6 LTS   5.4.0-84-generic   containerd://1.6.21
node2.example.com    Ready    <none>          38s     v1.29.3   10.100.0.102   <none>        Ubuntu 18.04.6 LTS   5.4.0-84-generic   containerd://1.6.21
💡 좀 더 명령어 쉽게 확인 할 수 있는 Kubectl cheat sheet
https://kubernetes.io/docs/reference/kubectl/quick-reference/
kubectl Quick Reference
This page contains a list of commonly used kubectl commands and flags. Note: These instructions are for Kubernetes v1.29. To check the version, use the kubectl version command. Kubectl autocomplete BASH source <(kubectl completion bash) # set up autocomple
kubernetes.io
source <(kubectl completion bash) # configuração de autocomplete no bash do shell atual, o pacote bash-completion precisa ter sido instalado primeiro.
echo "source <(kubectl completion bash)" >> ~/.bashrc # para adicionar o autocomplete permanentemente no seu shell bash.
'Container > Kubernetes' 카테고리의 다른 글
| [K8S] Liveness Probe (Self-healing) Pod (1) | 2024.02.16 |
|---|---|
| [K8S] YAML 템플릿 및 Pod (0) | 2024.02.13 |
| [K8S] namespace란 (0) | 2024.02.13 |
| [K8S] 쿠버네티스 개념 및 Architecture (0) | 2024.02.09 |
| [K8S] kubectl command (0) | 2024.02.06 |


